Its been months, obviously. So much has happened all of which I vow to blog about in the New Year.
For now the big news is... I'm pregnant! Hello there honeymoon baby! We found out today that its a healthy boy and we're delighted. I'm off to visit family in the States tomorrow and be spoiled... as well I should be!
More to come in the next few weeks- scout's honor! New patterns, projects and nursery designs. Enjoy this frosty winter.

Tuesday, December 7, 2010
Thursday, August 19, 2010
The DIY Wedding- Stage 3
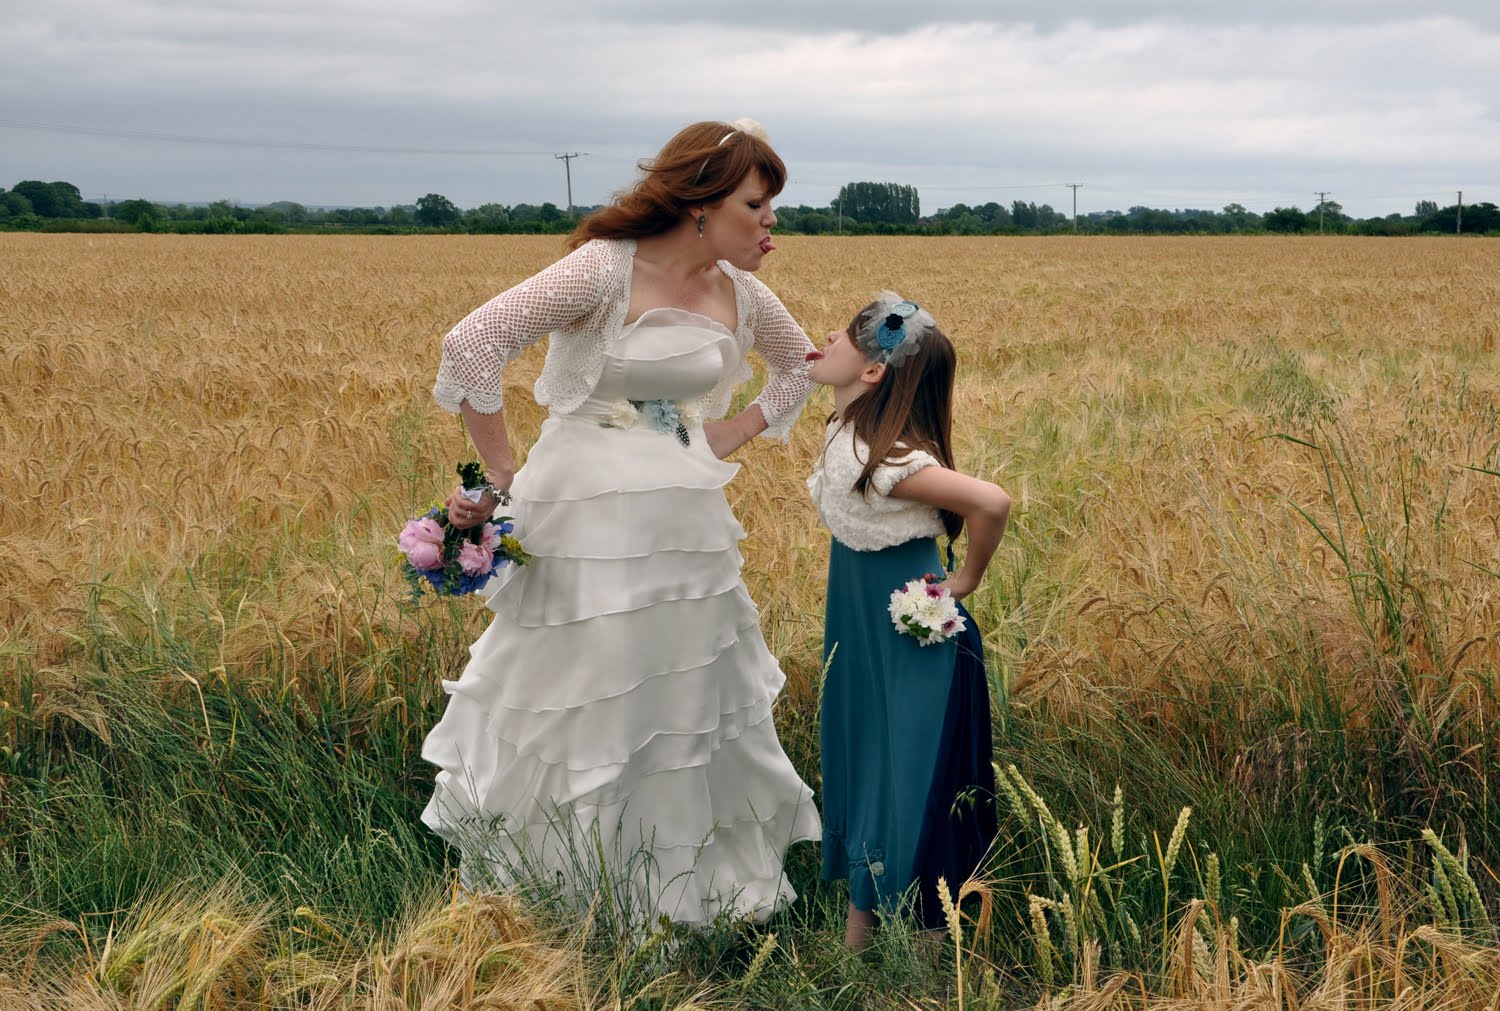
Originally when designing my wedding I was very ambitious and vowed to make everything myself... including my own dress. I wouldn't say I was overly ambitious because in hindsight I know I could've done it but to be honest I'm glad I didn't. I did manage to make my own sash and my neice's Little Lady dress (I prefer that title over flower girl... it sounds too "hippy"). All the fabric I had purchased for the bridesmaid dresses that never came to fruition had to be used and will continue to be used for quite some time as I have YARDS (okay metres... stupid angloization).
I really am pleased with the way it turned out and Lydia looked fantastic! I love that kid.


I really am pleased with the way it turned out and Lydia looked fantastic! I love that kid.


Tuesday, August 10, 2010
The DIY Wedding- Stage 2
Growing up my Mom was quite the hostess. There were few Saturday evenings when we were home alone as our house became a social gathering spot for everyone after church. She would dress the table in the early morning adding little details like those vintage salt and pepper shakers or a well placed spoon. One fixture we were never out of was napkin rings of every imaginable shape and size. To this day I'm still fond of them so for my wedding although extremely low budget, as we've already discussed I decided to make some. I'll fill you in on the how to as well!

2"x 2" wood squares (I had an old stair rail that I carefully cut with a miter saw to a 1/2" thick but you will also find what you need at hobby and craft stores although England is lacking them quite horribly.)
hot glue and a hot glue gun
fabric of your choice
spool of matching thread
an additional embellishment of your choice ( I chose feathers)
twine
pinking shear
scissors


Step 3: Now this is where having a quick hand comes in. Take a square of your wood and hot glue a small dollop in the center then place the twine across it and press down with your finger to secure. Next add a spiral of glue on top of the twine and place a single fabric circle on top and press down to secure. It should look like this:


Saturday, July 31, 2010
The DIY Wedding- Stage 1
So now that the home situation is all taken care of it was time to move onto the wedding. With, again. a budget of nearly zero and an adventurous nature I vowed to make it a dazzling wedding by making everything myself. I'm not joking I set out to make EVERYTHING. Did this actually come to fruition in the end? No. But I learned a lot in the process.
We started off by designing our own invitations and announcements which turned out pretty great.

The theme I chose was a combination of "Vintage English Garden" which developed after perusing many wedding websites. I wanted it to look simple and handmade but whimsical and old fashioned as well. I think I succeeded but I'll let you be the judge!

I'm a huge fan of banners and bunting, I'm so pleased with how these turned out!
 |
| the tools you need |
 |
| finished product |
 |
| on the wedding day, see? Lovely! |
Napkin ring tutorial tomorrow! Stay tuned!
Friday, July 30, 2010
past, present, and future
hello again. In these past months I have undergone quite a transformation. In addition to permanently moving to England I have married my teenage sweetheart and am now settling down into what every woman does after marriage... nesting. And you know what that means?! A regular blog post filled with everything I've been up to and will continue to create! Finally I'm getting down to business as I've been trying to do for quite a while now.
So lets begin shall we? Starting with the buildup to the wedding and working its way forward each day: A few months before the wedding date I moved into our new apartment and was tasked with outfitting it. With a budget of practically zero Jon and I had to be creative and rely on the donations of our loving friends and family.We accumulated quite a bit of goodies (to our delight!) and put in some hard man hours to make our first place a warm and creative environment.
We stumbled upon a few moldy, rusty, and dingy lawn chairs and turned them into mod cobalt blue metallic beauties which I love.


Next we found a set of 5 vintage velour danish modern chairs for £20. The previous owners were both pet owners and smokers so they had a bit of an... "odour". I tried my hand at recovering one for our office, or what we actually call the "Roosevelt Room" for some odd reason.


 A family friend gave us a dresser on wheels which, because I'm in love with color lately, decided to paint... I still haven't finished. I started it in May. Eek!


As time progresses and word spreads that we're on the hunt for home wares more and more vintage goodies pour in and we couldn't be more delighted. Now that the home is settled the next step is wedding decor! Until next time, happy creating!
So lets begin shall we? Starting with the buildup to the wedding and working its way forward each day: A few months before the wedding date I moved into our new apartment and was tasked with outfitting it. With a budget of practically zero Jon and I had to be creative and rely on the donations of our loving friends and family.We accumulated quite a bit of goodies (to our delight!) and put in some hard man hours to make our first place a warm and creative environment.
We stumbled upon a few moldy, rusty, and dingy lawn chairs and turned them into mod cobalt blue metallic beauties which I love.


Next we found a set of 5 vintage velour danish modern chairs for £20. The previous owners were both pet owners and smokers so they had a bit of an... "odour". I tried my hand at recovering one for our office, or what we actually call the "Roosevelt Room" for some odd reason.


As time progresses and word spreads that we're on the hunt for home wares more and more vintage goodies pour in and we couldn't be more delighted. Now that the home is settled the next step is wedding decor! Until next time, happy creating!
Saturday, February 20, 2010
just stumbled upon...
amazing twin brother artists via Etsy.com. You have to check them out!


Ryan is currently a "Featured Seller" on etsy so I can't take credit for the discovery. You can read his review here: http://www.etsy.com/featured_seller.php
Other news: The countdown continues to the final USA departure... 5 days left.
Ryan's shop: http://www.nativevermont.etsy.com/


Stephen's shop: http://www.geministudio.etsy.com/


Ryan is currently a "Featured Seller" on etsy so I can't take credit for the discovery. You can read his review here: http://www.etsy.com/featured_seller.php
Other news: The countdown continues to the final USA departure... 5 days left.
Thursday, February 11, 2010
pins and needles
Alright so I'm horrible at blogging. Its been two months since I last wrote after vowing to both myself and my fiance that I would write weekly, if not daily. In my defense and in the grand scheme of things I HAVE been rather busy.
Since I last wrote I have become engaged, traveled back to the United States, had an amazing product review/response to one of my baby mobiles which resulted in a slew of custom orders and sold/donated nearly all of my belongings. I've been busy! Now just as the dust has begun to settle my Visa has been approved after only three business days when originally we were quoted 50 days?! So its back to England in the next few weeks to begin wedding planning. I am one of those crazy brides that's attempting to execute the whole DIY wedding experience. Coming from an artistic background I have no doubt that my concept will be solid its just the execution of it all that worries me. I'll be back in a foriegn country away from the accessibility of the inexpensive supplies I would need to outfit my wedding. Oh, San Francisco how I will miss your amazing dime store finds and "everything" markets. I'm tempted to stock up while I can in my remaining days and ship it all abroad. We shall see!
Being that the point of this blog is to share with you my latest inspirations I must show you two amazing artists I have discovered on the beloved Etsy.com. Lise, of lilimandrill, her talent is a joy through and through. The attention to detail and level of originality demonstrated is refreshing! Please visit her shop and check out the stamp we had made! The shop: http://www.lilimandrill.etsy.com/ , and the stamp : http://www.etsy.com/view_listing.php?listing_id=39843866 . In addition to lilimandrill I discovered IsabellsArt which is a mythical and magical shop with intricately laser carved shadow puppets and wall art. Her style has a dream-like quality that would add character to any room. But don't take my word for it! Check her out: http://www.isabellasart.etsy.com/ . Enjoy!
Please stay tuned I have so much more to share!
Subscribe to:
Comments (Atom)